 Skagit County
 Deciding to replace siding on a Burlington home is rarely a snap judgment. It's usually the result of watching a problem get worse for a season or two — paint that won't hold, a soft spot near the bottom edge of a wall, seams that keep opening back up no matter how many times they've been caulked. In a valley climate that runs wet most of the year, siding replacement isn't a cosmetic upgrade. It's the point where a home's exterior either gets rebuilt to actually handle Skagit County conditions, or gets a repeat of whatever wasn't working before. This page covers what a Burlington siding replacement should involve, from diagnosis through the finished wall.
Why Burlington Siding Wears Out Faster Than the National Average
Burlington sits low in the Skagit Valley, close enough to Skagit Bay to pick up salt-laden air on a regular basis and shaded enough on many lots that moss gets a long runway to establish itself on north-facing walls. Add driving rain that comes in sideways off Pacific storm systems rather than falling straight down, and you have three separate stresses working on a wall at the same time, year-round. None of them show up overnight. They accumulate — a finish that fades a few years early, a joint that lets in a little more water each winter, a shaded corner that never quite dries out between storms.
Most siding products sold nationally are engineered and tested for an average climate, not a valley that stays damp for most of the year. That gap between "rated for typical conditions" and "actually holds up in Burlington" is where premature siding failure usually starts. When we're called out to look at siding that's failing well before it should, the pattern is almost always the same: a product or installation detail that was fine somewhere drier, but wasn't matched to conditions here.
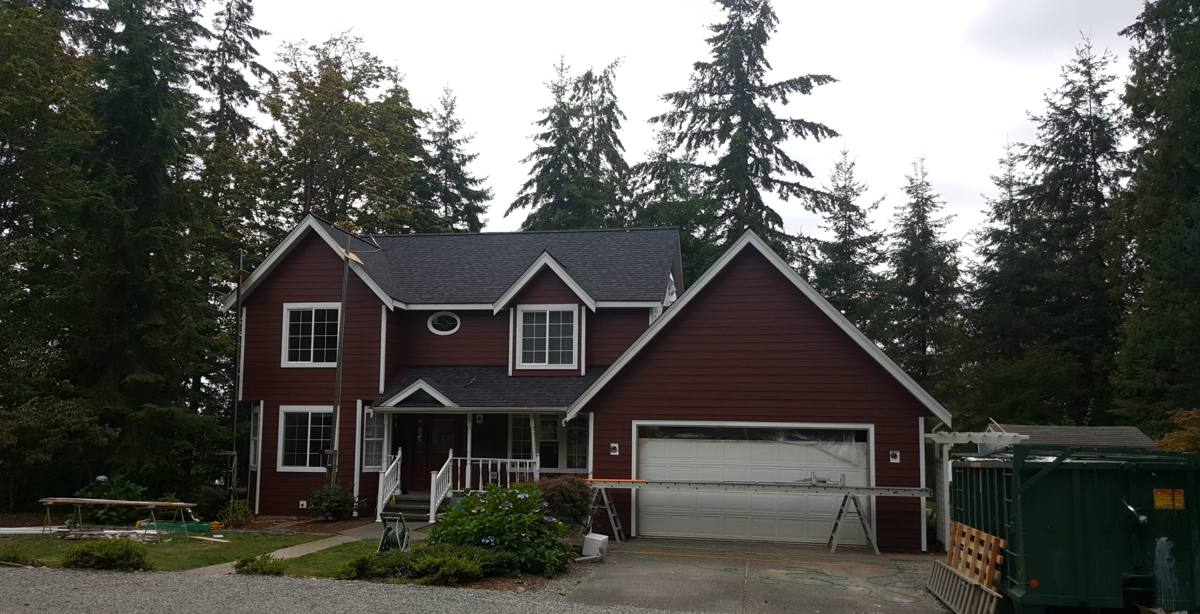
Signs a Burlington Home Actually Needs Replacement, Not Repair
Not every siding problem calls for a full tear-off. Some issues are legitimately isolated and repairable. But there's a point where patching becomes false economy — where the labor and material cost of chasing individual failures adds up to more than starting fresh with a correctly installed system. Here's how we sort that out on a walkthrough.
- Soft or spongy spots when pressed, especially near the bottom courses, around window sills, or below downspouts — a sign moisture has already reached the substrate
- Paint or finish that's failing across multiple walls rather than one isolated area, which usually points to a systemic moisture or product issue rather than one bad spot
- Persistent moss or mildew staining that comes back within a season of cleaning, particularly on shaded or north-facing walls
- Visible gaps, warping, or buckling at seams and butt joints, which lets wind-driven rain track behind the siding
- Cracking or delamination on lower-grade or older wood-based products, especially at cut ends that were never properly sealed
- Rising energy bills or drafty rooms that trace back to gaps in the wall assembly rather than windows or doors
If the damage is confined to a small area with sound siding everywhere else, a targeted repair can make sense. If it's spread across the house, or if the underlying material itself is the problem, replacement is usually the more honest recommendation — and the one that actually solves it instead of deferring the same failure a year or two down the road.
What a Correct Siding Replacement Involves
Tearing off old siding and nailing up new panels is the easy part. What actually determines whether a Burlington home stays dry for the next several decades happens underneath and around the panels — the parts a homeowner can't see once the job is done.
Tear-Off and Substrate Inspection
Full replacement starts with removing the old siding down to the sheathing, which is also the only real chance to find out what's been happening behind the old wall. Water damage, rot, or compromised framing that's been hidden for years shows up at this stage, and it needs to be addressed before anything new goes up — covering a wet or damaged substrate with new siding just seals the problem in.
Weather-Resistive Barrier and Flashing
A correctly installed weather-resistive barrier (house wrap) goes on before the siding, lapped properly at every seam to shed water downward and outward. Flashing gets integrated at every window, door, and roofline transition — not caulked over as an afterthought, but built into the sequence so water is directed out and away from the wall assembly. In a climate that pushes rain sideways as often as straight down, this layer matters as much as the siding itself.
Fastening, Clearance, and Joint Treatment
James Hardie siding has manufacturer-specified fastening patterns that vary by product line and local wind exposure, and clearance requirements from grade, decks, roofs, and other transitions that keep the bottom edge of the siding out of standing moisture. Joint and seam treatment needs to account for which walls sit in sun and which stay shaded and damp longer — a detail that matters more in a moss-prone valley than it would in a drier region.
Trim, Corners, and Finish Details
The last stage is trim, corner boards, and finish work — the details that determine whether the house looks finished and whether water has anywhere left to get in. Factory-finished ColorPlus panels need color-matched trim and touch-up so the finished wall reads as one consistent system, not a patchwork of field-painted repairs next to factory color.
Why We Only Replace Siding With James Hardie Fiber Cement
We install one siding product on every replacement job: James Hardie fiber cement. We don't offer vinyl, LP SmartSide, Cemplank, Allura, primed spruce, or cedar, and that's a deliberate standard, not a limited catalog. Each of those alternatives does something well — vinyl is inexpensive and low-maintenance in milder climates, engineered wood products install fast and take paint well, cedar has real natural character — but each comes with a trade-off that matters too much in a Skagit Valley climate for us to put our name behind it on a full replacement.
Vinyl can warp and grow brittle with temperature swings over time, and its seams and J-channels are exactly the kind of gap that wind-driven rain works into over the years. Wood-based products depend on flawless field priming and sealing at every cut edge to keep sustained moisture out of an organic substrate — a standard that's hard to hold across an entire crew, on every job, for the full life of the siding. Cedar is genuinely attractive, but it's organic too, and it asks for ongoing upkeep — refinishing, sealing, moss control — to keep performing through a valley climate that doesn't offer much of a dry stretch to recover in between storms.
Fiber cement handles the core problem differently because it isn't organic. There's no wood substrate for moisture to work into, and it doesn't feed moss and mildew growth the way wood-based products can. James Hardie also builds climate-specific HZ product lines engineered around sustained moisture and coastal exposure, rather than one generic formulation sold everywhere in the country. Paired with a factory-applied ColorPlus finish — baked on under controlled conditions instead of painted on-site — it holds color and resists cracking longer than most field-applied finishes manage through a climate this wet.
Comparing Siding Options for a Burlington Replacement
| Material | How It Handles Sustained Moisture | Typical Maintenance | Where It Falls Short Here |
|---|---|---|---|
| James Hardie fiber cement | Inorganic core, engineered HZ lines for coastal/wet climates | Periodic cleaning; factory finish holds color | Higher upfront cost than vinyl |
| Vinyl | Doesn't absorb moisture, but seams and J-channels admit wind-driven rain | Low, but can warp or crack with age and temperature swings | Seam-driven water intrusion in driving-rain conditions |
| LP SmartSide / engineered wood | Organic substrate; depends on intact factory and field sealing | Moderate; cut edges need diligent field sealing | Vulnerable at any missed or degraded seal point |
| Cedar | Organic, absorbs and releases moisture; needs airflow to dry out | High; refinishing, sealing, moss control | Long wet season limits drying time between storms |
What Drives Cost on a Burlington Siding Replacement
Every home is different, and we won't quote a number without seeing the house, but a few factors consistently move the price on replacement jobs in this area.
| Cost Factor | Why It Matters |
|---|---|
| Home size and wall complexity | More square footage and more corners, gables, and trim details mean more material and labor |
| Substrate condition found at tear-off | Rot or water damage discovered behind old siding adds repair scope before new siding can go up |
| Siding profile and accessories | Lap width, shingle-style panels, and trim board choices affect material cost and install time |
| Access and site conditions | Multi-story walls, tight lot lines, or landscaping obstructions add labor and staging time |
| Weather window during the project | Skagit County's wet season can extend timelines and requires sequencing that protects an open wall |
How We Approach a Burlington Replacement Project
Working a valley climate like this one for years changes how you sequence a siding job. We plan tear-off in sections rather than opening an entire wall at once whenever weather is uncertain, so a house is never left exposed longer than necessary. We inspect every wall as it's opened up rather than assuming the substrate matches what we expected from the outside. And we specify the Hardie product line and finish appropriate to a given wall's sun and shade exposure rather than treating every side of the house the same.
A crew that already works Burlington and the surrounding Skagit Valley knows which details matter most here — how far to keep siding clear of grade given the amount of standing moisture common on low lots, how aggressively to flash a north wall that's going to stay shaded and damp longer than the rest of the house, and how to schedule around a wet season that doesn't leave large dry windows to work in. That local pattern recognition is hard to substitute for, and it's part of what separates a replacement that lasts decades from one that starts showing the same problems again in a few years.
What to Expect From Start to Finish
- Initial walkthrough and assessment — we look at existing siding, trim, and any visible signs of moisture or damage, and talk through what full replacement would involve for your specific house
- Written scope and estimate — a clear breakdown of material, labor, and any anticipated substrate repair, not a vague lump-sum number
- Scheduling around weather — we plan sequencing to avoid leaving open walls exposed through an incoming storm system whenever possible
- Tear-off and substrate inspection — old siding comes off in manageable sections, with any hidden water damage or rot addressed before new material goes up
- Weather barrier, flashing, and siding installation — house wrap, flashing, and Hardie panels installed to manufacturer specification and matched to each wall's exposure
- Trim, finish, and final walkthrough — corner boards, trim, and touch-up completed, followed by a walkthrough so you can see the finished work before we call the job done
Questions Worth Asking Before You Sign
- What will you do if you find rot or water damage once the old siding comes off?
- Which James Hardie product line and finish are you specifying for this house, and why?
- How do you handle flashing at windows, doors, and roof transitions specifically?
- What's your plan for weather delays during a multi-week project?
- What does your warranty cover, and is it transferable if I sell the house?
If your Burlington home's siding is showing its age — fading finish, soft spots, moss that keeps coming back, or joints that won't stay sealed — we're glad to take a look and give you a straight answer about whether it needs replacement or just repair. Reach out for a free, no-pressure estimate; the form below gets you started.